How to Clean Your Grill Rescue Grill Brush: A Comprehensive Guide

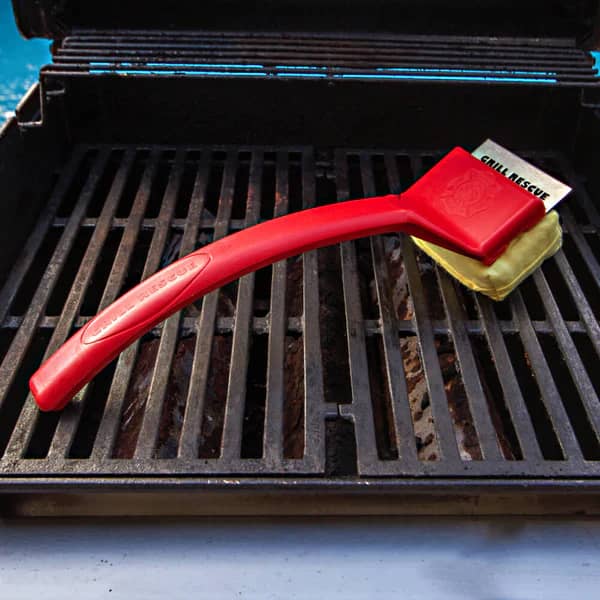
The Grill Rescue Grill Brush is a unique and effective tool designed to clean your grill grates without the risk of wire bristles breaking off and potentially contaminating your food. Keeping your Grill Rescue brush clean is crucial for maintaining its effectiveness and longevity. Follow this step-by-step guide to ensure your grill brush is always ready for action.
Tools and Supplies You’ll Need
- Grill Rescue Grill Brush
- Warm water
- Mild dish soap
- Soft cloth or sponge
- Towel
- Cleaning gloves (optional)
Step-by-Step Cleaning Instructions
1. Cooling the Brush
Before you start cleaning, make sure the Grill Rescue Brush is cool. If you’ve recently used it, allow it to cool down completely to avoid burns.
2. Removing the Cleaning Head
The Grill Rescue Grill Brush features a removable cleaning head. To clean it thoroughly, detach the cleaning head from the handle. This can typically be done by sliding or unscrewing it, depending on the model. Refer to the manufacturer’s instructions if you’re unsure how to remove the head.
3. Rinsing Off Loose Debris
Once the cleaning head is removed, rinse it under warm running water. This helps to remove any loose debris and grease. You can use your hands or a soft cloth to assist in this process. If you prefer, wear cleaning gloves to keep your hands clean.
4. Soaking the Cleaning Head
Fill a sink or a bucket with warm water and add a few drops of mild dish soap. Place the cleaning head in the soapy water and let it soak for about 10-15 minutes. This soak helps to loosen any stubborn grease and grime stuck to the bristles or scrubbing surface.
5. Scrubbing the Cleaning Head
After soaking, use a soft cloth or sponge to scrub the cleaning head gently. Pay special attention to any areas with heavy buildup. Avoid using abrasive materials or brushes that could damage the cleaning surface. Continue scrubbing until the head is visibly clean.
6. Rinsing and Drying
Rinse the cleaning head thoroughly under warm running water to remove any soap residue. Shake off excess water and pat it dry with a towel. Ensure the cleaning head is completely dry before reattaching it to prevent mold or mildew growth.
7. Cleaning the Handle
While the cleaning head is soaking, take a moment to clean the handle of your Grill Rescue Brush. Wipe it down with a damp cloth and a small amount of mild dish soap if needed. Dry the handle thoroughly before reassembling the brush.
8. Reassembling the Brush
Once both the cleaning head and handle are dry, reattach the cleaning head to the handle. Make sure it is securely in place according to the manufacturer’s instructions.
9. Storing the Brush
Store your Grill Rescue Brush in a dry place, preferably hanging or in a tool rack, to keep it clean and ready for the next use. Proper storage helps to maintain the integrity of the cleaning head and prolong the life of your brush.
Maintenance Tips for Your Grill Rescue Brush
- Regular Cleaning: Clean your Grill Rescue Brush after every few uses to prevent buildup of grease and grime. This will keep the brush effective and hygienic.
- Inspect the Brush: Regularly check the cleaning head for wear and tear. If the scrubbing surface becomes damaged or worn out, consider replacing the cleaning head to maintain optimal performance.
- Avoid Harsh Chemicals: Stick to mild dish soap and avoid using harsh chemicals or abrasive cleaners that can damage the brush.
- Dry Completely: Always ensure the cleaning head is completely dry before storing to prevent mold and mildew.
Conclusion
Cleaning your Grill Rescue Grill Brush is a straightforward process that ensures your grill stays clean and your food safe. By following these simple steps, you can maintain your brush in top condition, ready to tackle any grilling session. Regular maintenance of your grill brush not only prolongs its life but also enhances your grilling experience by ensuring you have a clean tool at your disposal. Happy grilling!


